
My goal each year is to make my daughter's Halloween costume. I knew that it was going to be cold this year, in years past it has been very warm. I wanted to make sure that after all of my hard work on her costume....it wasn't necessary to wear a coat over all that hard work! It was very simple...labor intensive....but simple. I have included my
steps in making the costume as well as the template for cutting out the
leaf shapes.
What you need:
- 1-2 yards of brown fleece for the body and the wings.
- More or less, depending on the size
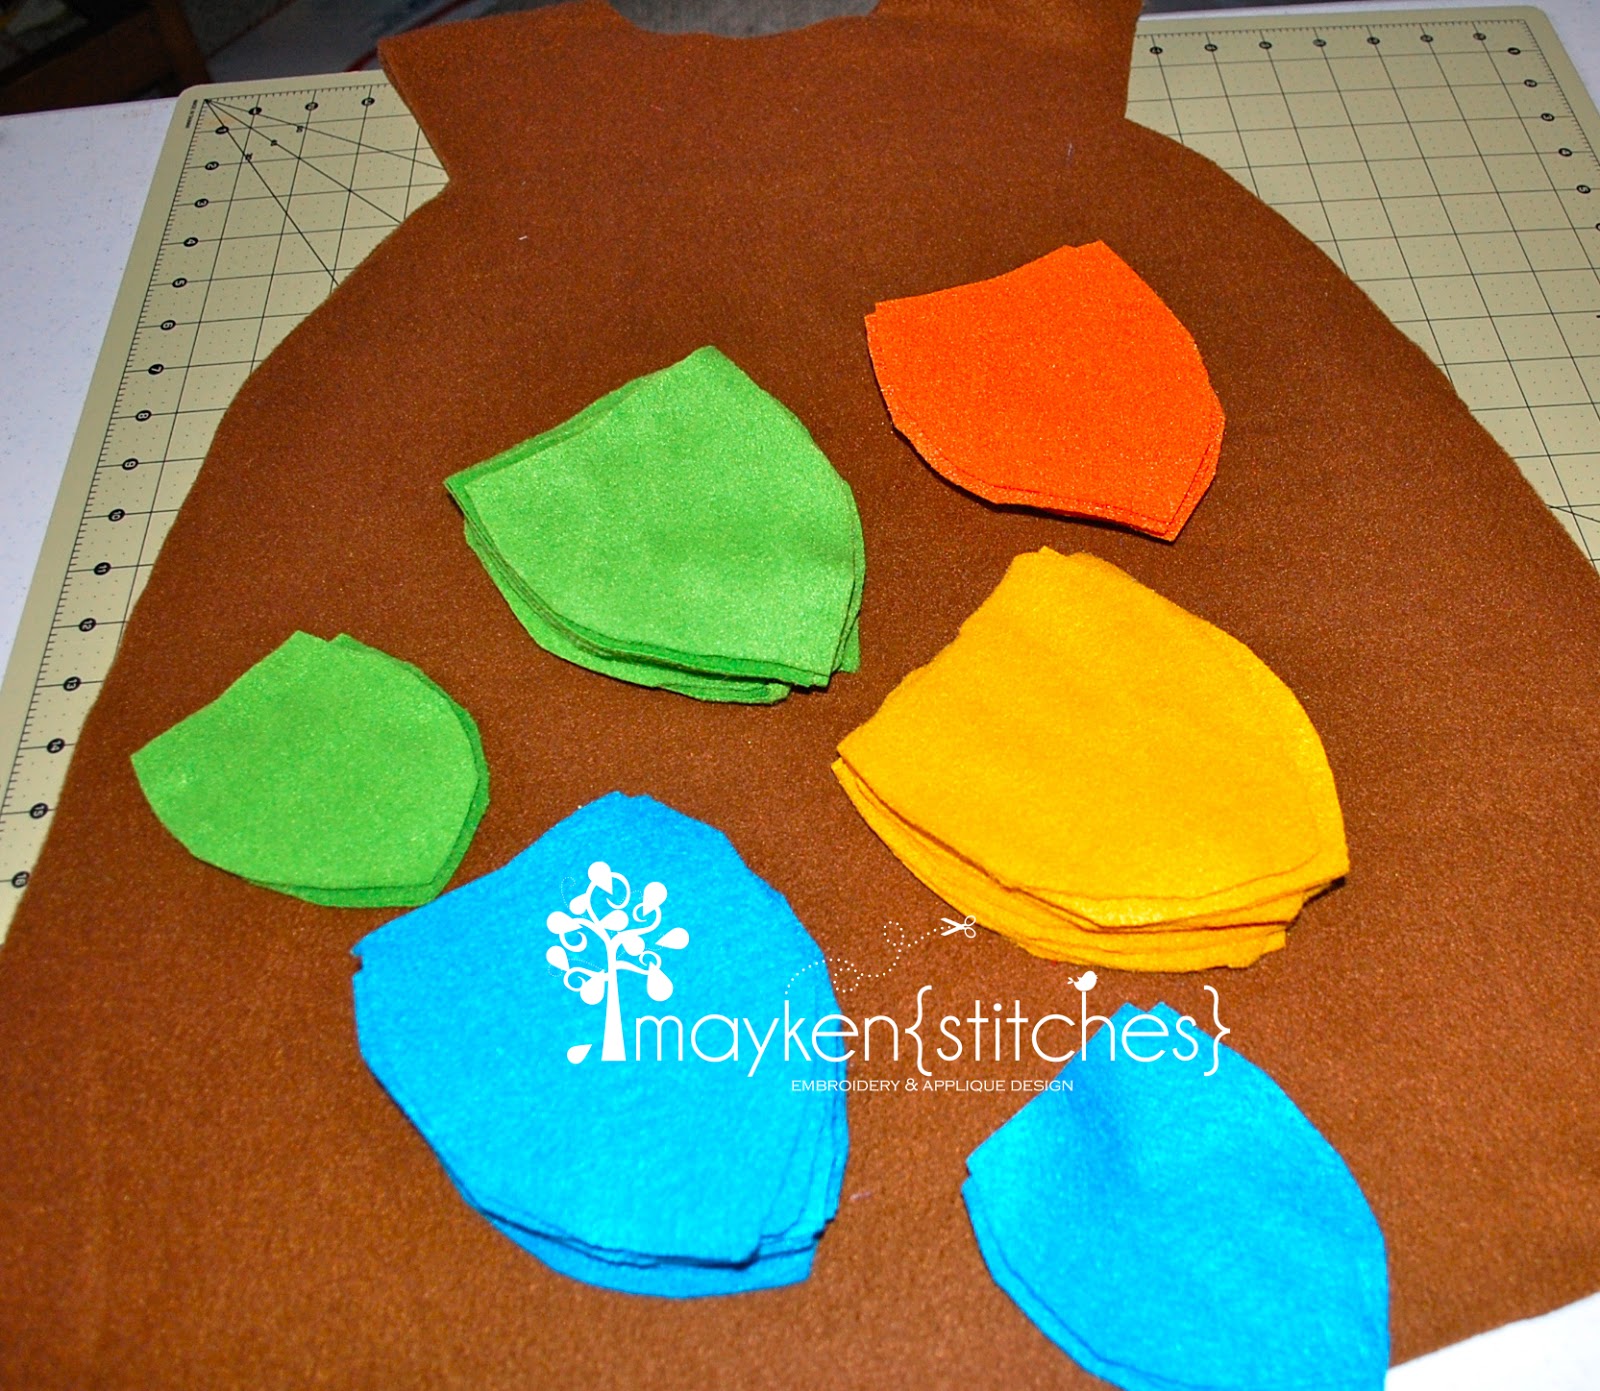
- 1/2 yard of felt (for each color)
- I used 4 colors
- Leaf template (included)
- Faux feathers
- Thread
- Scissors
- Sewing Machine
- Straight Pins
- +/- elastic for the bottom of the costume.
- I found that this helped it poof out at the bottom
Step 1: Make a pattern from an already existing dress. Note: Make sure the dress fits now or you may have to adjust for the sizing. I laid the dress on the butcher paper and traced around it, leaving a 1/4 inch margin just for stitching. Cut 2 exactly the same.

Step 2: Stitch together the 2 pieces at the shoulders only!


Step 3: Here is where the labor intensive part comes in......cutting the feathers. I have included a template just to help with the shaping of the leaves. There are 2 sizes of leaves. I found that the little ones helped to cover any gaps. The little ones also work very well around the neck of the costume. I cut 10 of each color. This will vary depending on the amount of colors and the size of your costume.

Step 4: VERY IMPORTANT...start at the bottom when attaching your feathers. I found that pinning and stitching them one row at a time worked well. Be sure to distribute your colors to avoid too much of the same color in one area.


Step 5: Love on your little helper!

Step 6: Keep sewing......and sewing. Then voila!
Step 7: This is the point when I added the faux feathers in random places. Unfortunately, I did not photograph this step. But you can see how they were placed in the final result.


Step 9: WINGS!! For whatever reason, I forgot about taking photos during this step. I cut the brown fleece in a wide triangle shape, sewed a tie on the inside close to the wrist area to keep them on her arms during the festivities. Repeated the feather cutting format for the back of the wings.


Step 10: Cross my fingers that after all that work....she will wear it and let me take some cut photos! I will note that this is the only time throughout the night that she would wear the mask. hrmf!
Enjoy!
Enjoy!
No comments:
Post a Comment